Public Cloud Infrastructure
18 Jul 2021 • Leave CommentsThis will presents a general setup on public cloud platform (e.g. AWS) to launch a web server.
General Components
Pay attention to the charging items:
- Compute instance, like EC2.
- Running time.
- VPC (Virtual Private Cloud) Network
- Elastic IP.
- Firewall like Security Group (zone) and Compute iptables.
- Bandwidth or traffic.
- Storage, like EBS (Elastic Block Storage).
- Compute Storage
- Image storage
Oracle
THINK TWICE before rebooting a instance or detach block volume from a instance. Check Instance Configuration for details.
Glossary
Oracle Cloud Infrastructure (OCI):
- Tenancy. Subscription account, the root account included.
- User. A login user account, including the Oracle federated OracleIdentityCloudService.
-
Compartment. A group of resources for different projects, like Finance compartment, Logging compartment etc. Think of compartment as Linux Cgroup or Tess cluster.
See link for all resources within the root compartment.
- Tag namespace. A group of tags applied to resources. Think of tag namespace as Tess namespace - just another dimension of resources organization.
Always-free
Always free resources does not limit running time or network traffic:
- 2 instances.
- 2 public IPs. Can be changed for free.
- 200 GB volume storage (boot volume + block volume) plus 5 volume backups.
- 2 VCN (Virtual Cloud Network).
-
Cloud Shell. Cloud Shell is a browser-based VM and separated from resournces above (e.g. 50 GB standalone storage). We can manage OCI instances through the Cloud Shell.
Apart from Cloud Shell, we also have 'Web Shell'. Web Shell is a browser-based interface to a particular instance, usually for management.
Instance Configuration
- Create an instance
- Select resources with "Always Free Eligible" label.
- Select Oracle Linux is recommended. CentOS is deprecated.
- Instance shape is "VM.Standard.E2.1.Micro".
- Upload SSH public key.
- Configure VCN. Each VCN includes a VNIC (Virtual Network Interface Card) attached to the instance. The core part of VCN and VNIC is:
- Subnet for internal network.
- Public IP address. Public IP assigned may be blocked, but we can always got a new one free of charge at: Compute - Instances - Instance Details - Attached VNICs - VNIC Details - IPv4 Addresses.
- Security List (firewall). Add "ingress rules" to the default "security list". By default, only port 22 on ingress is allowed. Leave the "Stateless" alone, otherwise you need to add matching "egress rules". By default, ICMP is blocked; SSH is allowed. Probably, we should enable 80/443.
- Block Volume. By default, each instance is assigned 50 GB boot volume. However, each account can have up to 200 GB volume.
- Create a 50 GB block volume.
-
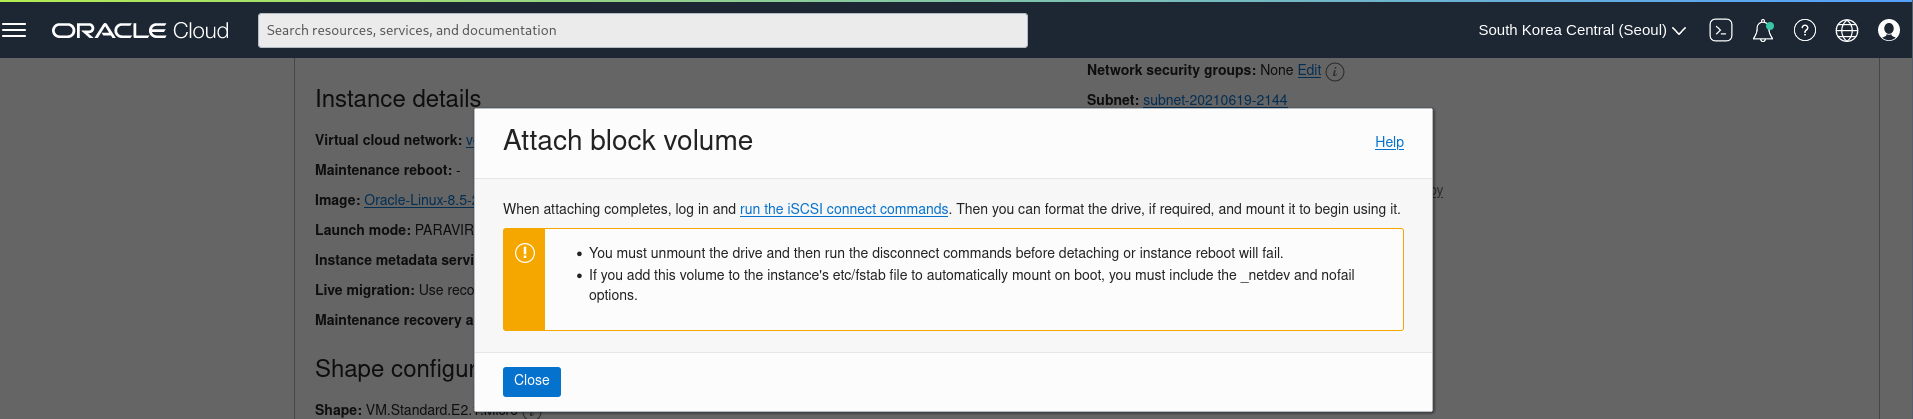
Attach the block volume. When you "terminate" an instance, the block volume attached remain. Be careful over free quota!
Step 3 and step 4 below is dangerous! Mount the attached block volume only on demand.
-
Login and run the iSCSI connect commands. Attention that the block volume use network connection:
~ $ sudo lsof -nP -i tcp:3260 ~ $ sudo fdisk -l /dev/sdb -
Either mount the device somewhere (e.g. "/opt") or extend it to root LVM.
To mount the new device by "/etc/fstab", remember to add
_netdevandnofailoptions, as attached block volumes require network access upon boot.
CAUTION: before rebooting the instance or detaching the block volume, please revert step 4 and step 3 above, otherwise we lost contact to our instance, even Web/Cloud Shell would not help!
- Optionally, disable OCI plugins, like the Custom Logs Monitoring. OCI plugins communicate with oracle-cloud-agent.service on instance to collect performance metrics, install OS updates, perform other instance management tasks, etc.
Repeat above steps for another free instance. By default, both instances share the same VCN, subnet and security list.
Linux Configuration
If you are unware of the following actions, just skip it.
-
Disable or enable Orable Cloud Agent.
~ $ systemctl stop oracle-cloud-agent ~ $ systemctl disable oracle-cloud-agent ~ $ systemctl stop oracle-cloud-agent-updater ~ $ systemctl disable oracle-cloud-agent-updater -
Disable or enable rpcbind.
~ $ systemctl stop rpcbind.service ~ $ systemctl stop rpcbind.socket ~ $ systemctl stop rpcbind.target ~ $ systemctl disable rpcbind ~ $ systemctl disable rpcbind.socket -
Optionally disable cockpit.socket for Web Shell.
You are recommended to leave it open for online instance debug.
-
As CentOS is EOL. We should change the mirrorlist.
~ $ sudo sed -i.bak 's/mirrorlist=/#mirrorlist=/g' /etc/yum.repos.d/CentOS-*
~ $ sudo sed -i.bak 's|#baseurl=http://mirror.centos.org|baseurl=http://vault.centos.org|g' /etc/yum.repos.d/CentOS-*

# fix librepo issue
~ $ sudo yum install python3-librepo
From now on, Oracle Linux is recommended.
-
Firewall. By default, firewalld is enabled and most ports are disallowed! At least enable 80 and 443.
~ $ sudo firewall-cmd --permanent --zone=public --add-service=http --add-service=https
~ $ sudo firewall-cmd --reload
~ $ sudo firewall-cmd --list-all
To allow a port, we should be both enable it in VCN and on instance.
Block Volume
It is not recommended to extend the block volume into existing LVM as the reverting process is complicated! When rebooting the instance or detaching the block volume, we must revert steps below. See Instance Configuration.
Firstly, prepare the disk partition:
~ $ sudo fdisk -l

~ $ sudo parted -a opt /dev/sdb

(parted) mklabel gpt
(parted) unit s
(parted) print free
(parted) mkpart primary xfs 0% 100%
(parted) name 1 blockvolume
(parted) print free
(parted) quit

~ $ sudo fdisk -l
~ $ sudo blkid
Then, we make a filesystem on the block volume as below. This step is optional as the we will use this partition as LVM, and the filesystem created will be erased!
~ $ sudo mkfs.xfs /deb/sdb1
~ $ sudo lsblk
~ $ sudo blkid
Let's inspecting existing LVM. There is only LV created /dev/centosvolume/root storage of which we will extend soon.
# LVM inspection
~ $ sudo pvscan -v ; sudo pvdisplay -v
  PV /dev/sda3   VG centosvolume    lvm2 [<39.06 GiB / 0    free]
  Total: 1 [<39.06 GiB] / in use: 1 [<39.06 GiB] / in no VG: 0 [0   ]

~ $ sudo vgscan -v ; sudo vgdisplay -v
  Found volume group "centosvolume" using metadata type lvm2

~ $ sudo lvscan -v ; sudo lvdisplay -v
  ACTIVE            '/dev/centosvolume/root' [<39.06 GiB] inherit
Creating PV:
~ $ sudo pvcreate /dev/sdb1
WARNING: xfs signature detected on /dev/sdb1 at offset 0. Wipe it? [y/n]: y
  Wiping xfs signature on /dev/sdb1.
  Physical volume "/dev/sdb1" successfully created.

~ $ sudo pvdisplay -v
Add the new PV to existing VG:
~ $ sudo vgextend -v centosvolume /dev/sdb1
  Wiping signatures on new PV /dev/sdb1.
  Archiving volume group "centosvolume" metadata (seqno 2).
  Adding physical volume '/dev/sdb1' to volume group 'centosvolume'
  Volume group "centosvolume" will be extended by 1 new physical volumes
  Creating volume group backup "/etc/lvm/backup/centosvolume" (seqno 3).
  Volume group "centosvolume" successfully extended

~ $ sudo vgdisplay -v
Add the new to existing LV:
~ $ sudo lvextend -v --extents +100%FREE /dev/centosvolume/root
  Converted 100%FREE into at most 12799 physical extents.
  Archiving volume group "centosvolume" metadata (seqno 3).
  Extending logical volume centosvolume/root to up to 89.05 GiB
  Size of logical volume centosvolume/root changed from <39.06 GiB (9999 extents) to 89.05 GiB (22798 extents).
  Loading table for centosvolume-root (253:0).
  Suspending centosvolume-root (253:0) with device flush
  Resuming centosvolume-root (253:0).
  Creating volume group backup "/etc/lvm/backup/centosvolume" (seqno 4).
  Logical volume centosvolume/root successfully resized.

~ $ sudo vgdisplay -v
  --- Volume group ---
  VG Name               centosvolume
  System ID
  Format                lvm2
  Metadata Areas        2
  Metadata Sequence No  4
  VG Access             read/write
  VG Status             resizable
  MAX LV                0
  Cur LV                1
  Open LV               1
  Max PV                0
  Cur PV                2
  Act PV                2
  VG Size               89.05 GiB
  PE Size               4.00 MiB
  Total PE              22798
  Alloc PE / Size       22798 / 89.05 GiB
  Free  PE / Size       0 / 0
  VG UUID               1xOpAZ-6Idw-y2Oa-ELis-d338-8VgM-xyz

  --- Logical volume ---
  LV Path                /dev/centosvolume/root
  LV Name                root
  VG Name                centosvolume
  LV UUID                2r1j88-PO5l-Fqrj-oeGz-T8Ez-TMSV-xyz
  LV Write Access        read/write
  LV Creation host, time localhost, 2021-05-25 17:18:43 +0000
  LV Status              available
  # open                 1
  LV Size                89.05 GiB
  Current LE             22798
  Segments               2
  Allocation             inherit
  Read ahead sectors     auto
  - currently set to     8192
  Block device           253:0

  --- Physical volumes ---
  PV Name               /dev/sda3
  PV UUID               NnWbVT-DtBY-XUMh-iFnD-JQZD-bXuJ-xyz
  PV Status             allocatable
  Total PE / Free PE    9999 / 0

  PV Name               /dev/sdb1
  PV UUID               yYxOYl-xxHv-EBOf-3jTw-O34v-BmmQ-xyz
  PV Status             allocatable
  Total PE / Free PE    12799 / 0
From output above, we find the LV size is expanded to over 89 GiB. However, the XFS filesystem does not about this storage expansion. Let's do it again:
~ $ df -h
Filesystem                     Size  Used Avail Use% Mounted on
devtmpfs                       361M     0  361M   0% /dev
tmpfs                          403M     0  403M   0% /dev/shm
tmpfs                          403M   41M  362M  11% /run
tmpfs                          403M     0  403M   0% /sys/fs/cgroup
/dev/mapper/centosvolume-root   40G   11G   29G  27% /
/dev/sda2                     1014M  328M  687M  33% /boot
/dev/sda1                      100M  6.9M   93M   7% /boot/efi
tmpfs                           81M     0   81M   0% /run/user/1000

~ $ sudo xfs_growfs /dev/centosvolume/root
meta-data=/dev/mapper/centosvolume-root isize=512    agcount=4, agsize=2559744 blks
         =                       sectsz=4096  attr=2, projid32bit=1
         =                       crc=1        finobt=1, sparse=1, rmapbt=0
         =                       reflink=1
data     =                       bsize=4096   blocks=10238976, imaxpct=25
         =                       sunit=0      swidth=0 blks
naming   =version 2              bsize=4096   ascii-ci=0, ftype=1
log      =internal log           bsize=4096   blocks=4999, version=2
         =                       sectsz=4096  sunit=1 blks, lazy-count=1
realtime =none                   extsz=4096   blocks=0, rtextents=0
data blocks changed from 10238976 to 23345152

~ $ df -h
Filesystem                     Size  Used Avail Use% Mounted on
devtmpfs                       361M     0  361M   0% /dev
tmpfs                          403M     0  403M   0% /dev/shm
tmpfs                          403M   41M  362M  11% /run
tmpfs                          403M     0  403M   0% /sys/fs/cgroup
/dev/mapper/centosvolume-root   90G   11G   79G  13% /
/dev/sda2                     1014M  328M  687M  33% /boot
/dev/sda1                      100M  6.9M   93M   7% /boot/efi
tmpfs                           81M     0   81M   0% /run/user/1000
If the root filesystem is ext4, then use resize2fs instead.
AWS
See "AWS_EC2.docx" and "kong-on-aws.md".
amazon-linux-extras
amazon-linux-extras is a mechanism to gurantee the stability of fresh packages on Amazon Linux 2. Currently, only a small number of packages are supported.
It's built upon YUM repository. Whenever a new package is installed through 'amazon-linux-extras', it add a corresponding YUM repository for the package.
Firstly, make sure amazon-linux-extras is installed.
~ $ type amazon-linux-extras

~ $ sudo yum install amazon-linux-extras

~ $ amazon-linux-extras --help
Packages supported by 'amazon-linux-extras' are called topic. List available topics.
~ $ amazon-linux-extras list
Enable a topic (YUM repository). The output will give you instructions how to install the topic.
# Postgres14 client topic
~ $ sudo amazon-linux-extras enable postgresql14

~ $ sudo yum repolist
Install a topic.
~ $ sudo yum clean metadata
~ $ sudo yum install postgresql14
To make it easier, we can enable and install a topic at once.
~ $ sudo amazon-linux-extras install postgresql14
Aliyun
to-do